“Art isn’t about perfection—it’s about passion in every stitch.”
The Wooly Owl
How to Crochet the Bobble Stitch – Step-by-Step Tutorial
Bobble Stitch adds a fun, puffy texture to crochet projects, making it perfect for blankets, scarves, and even amigurumi details. This stitch is created by working multiple half-finished double crochets (dc) into the same stitch and closing them together.
✨ Skill Level: Beginner-Intermediate
🧶 Materials Needed:
- Worsted weight yarn (or any yarn of your choice)
- Appropriate crochet hook (check yarn label for size recommendation)
- Scissors
- Tapestry needle (for weaving in ends)
Step 1: Create Your Foundation Chain
- Chain any even number of stitches + 2 extra chains for your foundation. (Example: Chain 22 for a swatch.)
- Turn your work and prepare to start Row 1.
Step 2: Row 1 – Single Crochet Across
- Insert your hook into the second chain from the hook.
- Yarn over (YO) and pull up a loop.
- YO and pull through both loops (this completes a single crochet).
- Repeat single crochet (sc) in each stitch across the row.
- Turn your work and chain 1.
Step 3: Row 2 – Start the Bobble Stitch
- Single crochet in the first stitch to create an even edge.
- Work a bobble stitch in the next stitch:
- YO, insert your hook into the stitch, YO and pull up a loop (you have 3 loops on your hook).
- YO, pull through two loops (this is an unfinished double crochet).
- Repeat this process four more times in the same stitch.
- You should now have 6 loops on your hook.
- YO and pull through all 6 loops at once to close the bobble.
- Chain 1 to secure the bobble.
- Single crochet in the next stitch to flatten the bobble on one side.
- Repeat (1 sc, 1 bobble stitch) across the row, ending with a single crochet.
- Turn your work and chain 1.
Step 4: Row 3 – Single Crochet Across
- Single crochet in each stitch across, making sure to place sc into the chain-1 space above each bobble stitch.
- This helps flatten the bobbles on the right side of the fabric.
- Turn your work and chain 1.
Step 5: Repeat Rows 2 and 3 Until Desired Length
- Keep alternating bobble stitch rows with single crochet rows to maintain the texture.
- Always work bobble stitches on the right side (odd-numbered rows) and single crochet rows on the wrong side (even-numbered rows).
Step 6: Finish Off & Weave in Ends
- Cut your yarn and pull through the last loop to secure.
- Use a tapestry needle to weave in loose ends for a clean finish.
✨ Tips for Success
✔ Keep your bobbles uniform by maintaining even tension.
✔ Use contrasting yarn colors for a playful effect.
✔ Block your finished work to enhance the stitch definition.

Check out some of these beautiful patterns using the Bobble Stitch

Bobblicious Sweater by KayKrochets – buy the pattern HERE
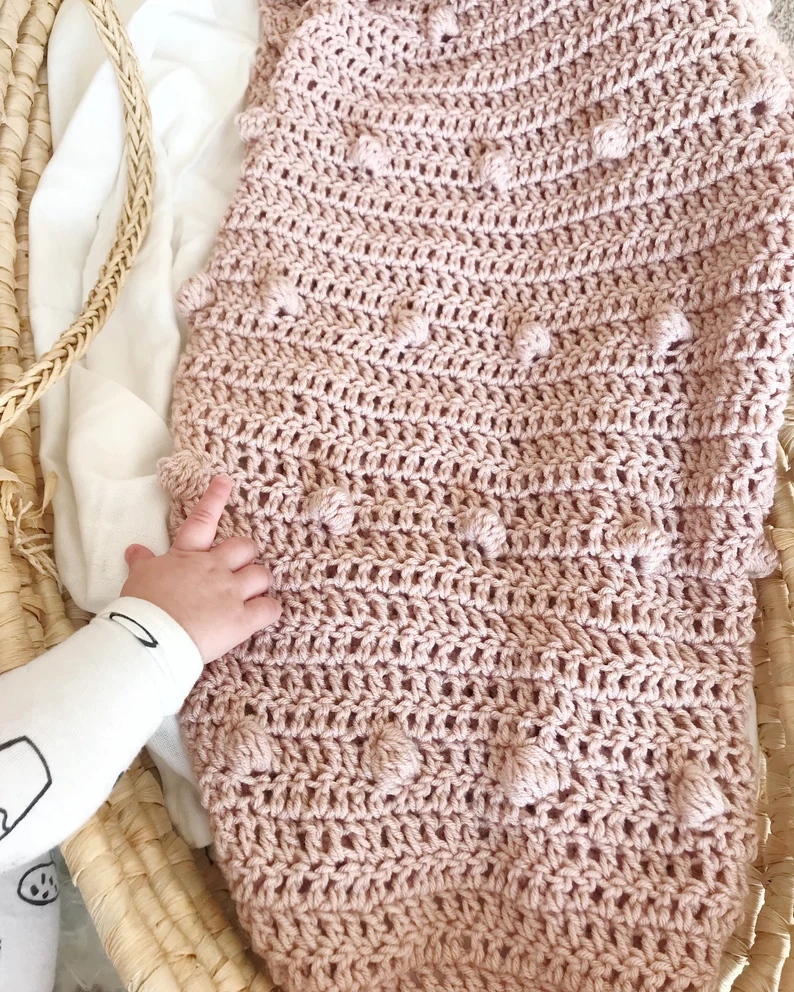
Bobble Stitch Blanket by MyDearKnot – buy the pattern HERE
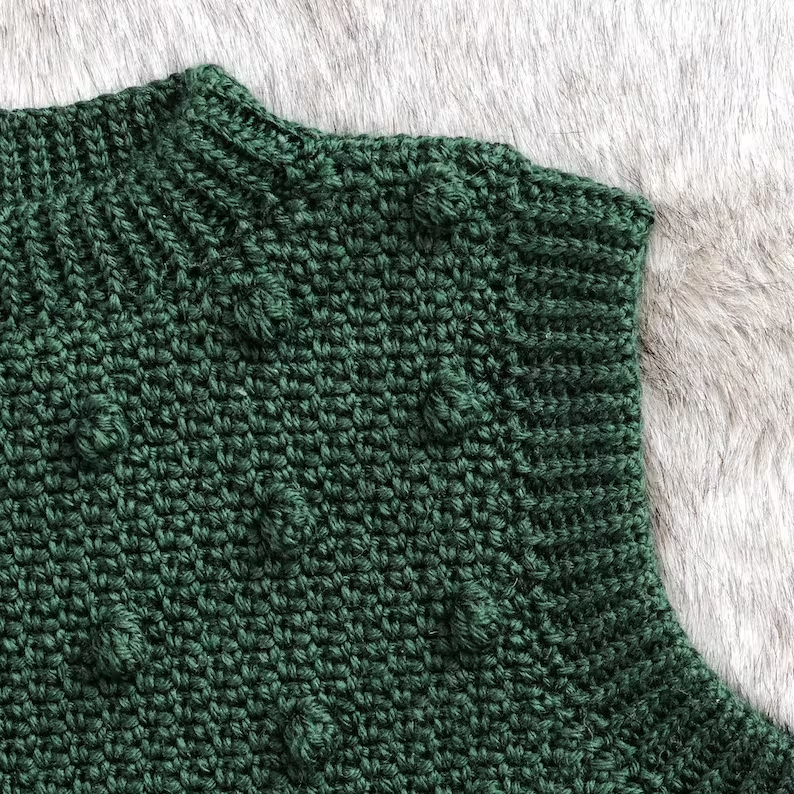
Nantucket Vest by TheCozyKnotCrochet – buy the pattern HERE
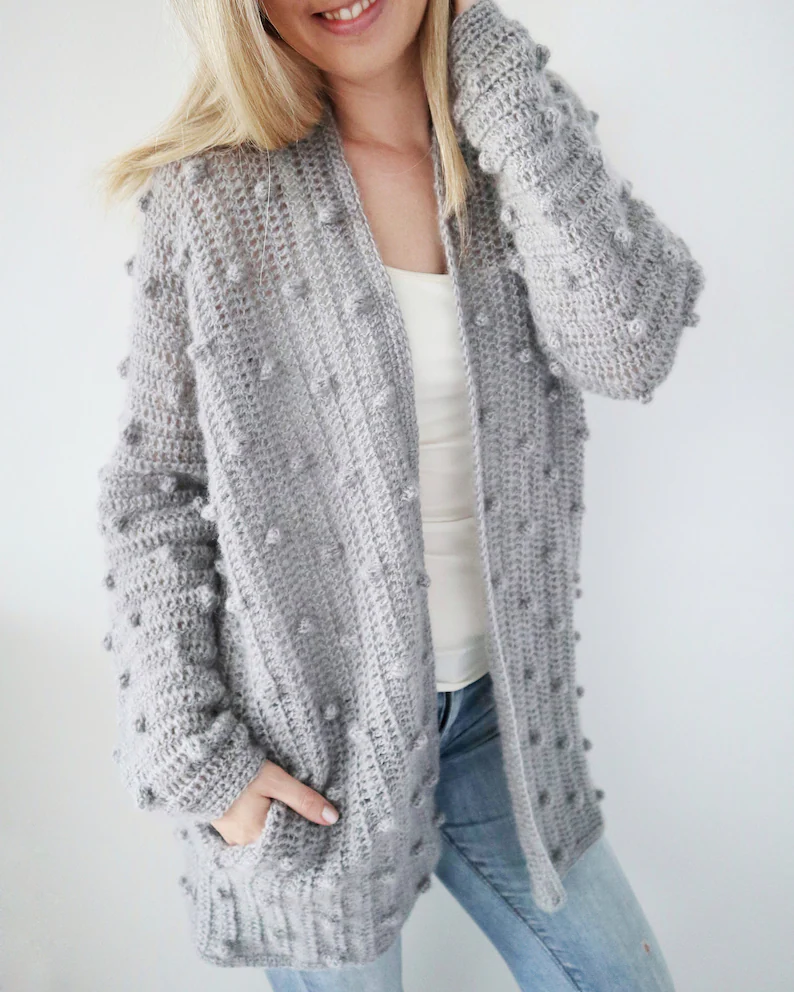
The Mayfield Cardigan by CoffeeCrocheting – buy the pattern HERE
Leave a Reply